How to Design a Custom Bar Mat: Sizes, Artwork, and Decoration Methods
A custom bar mat is one of the few branded objects a customer stares at for an entire drink, which is exactly why the design decisions behind it are worth getting right before anything goes to production. The choices are not complicated, but they interact: the size you pick limits how a logo can sit on the mat, the decoration method decides how many colors you get and how long the mat looks new, and the artwork you hand over determines whether fine detail survives being cast in rubber. Work through them in the right order and you end up with a mat that reads cleanly from across the bar and holds up through years of pours and dish pits.
Start with the size, because it sets everything else
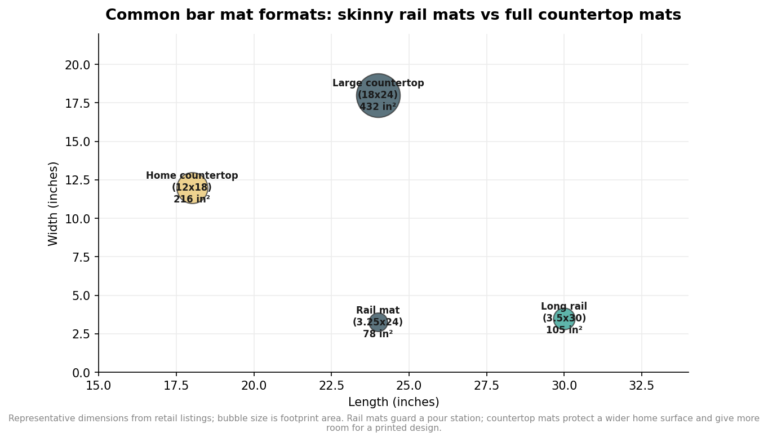
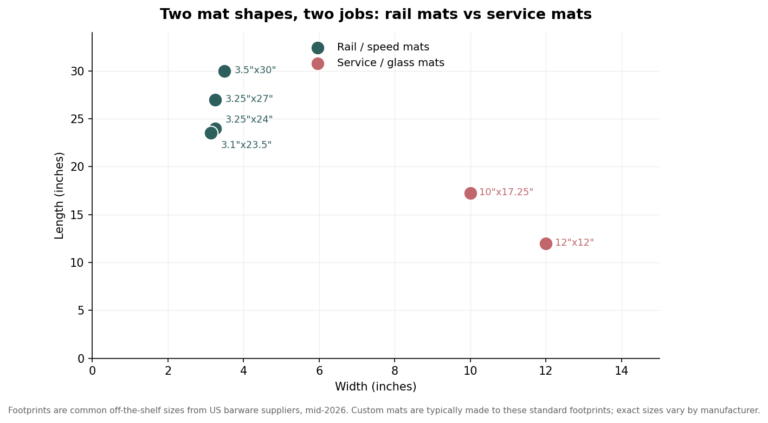
Bar mats come in two broad families. Rail mats are the long, narrow strips that run along the speed rail where bartenders build drinks, commonly about 3.25 to 3.5 inches wide in lengths from 18 to 30 inches. Service mats are the wider rectangles that sit on the bar top where drinks are handed off, in sizes like 12 by 12 and 12 by 18 inches, with shaker mats around 12 by 6 for the shaking station. Thickness across these usually runs about three-eighths to a half inch, enough to trap spills and cushion glassware.
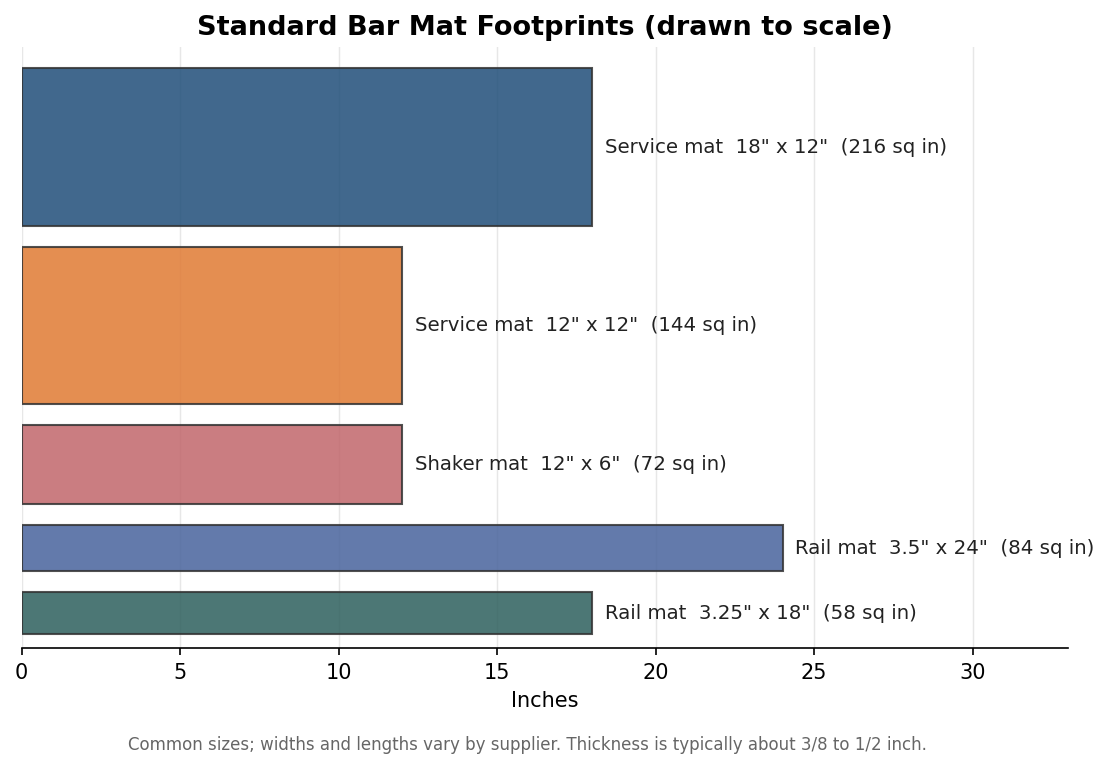
The shape matters for your logo because a wordmark that looks balanced on a square service mat has to be rethought for a 3.25-inch rail strip, where a tall stacked logo shrinks to nothing. Pick the placement first, then decide whether your mark runs horizontally along a rail or centers on a square, and design to that footprint rather than forcing one layout onto every size.
Molded, screen printed, or full color: three ways to carry your logo
How the logo gets onto the rubber is the decision that most affects durability and color. Molded rubber builds the color into the mat itself rather than printing on top, so the design is essentially part of the material and does not wear off with scrubbing; the trade-off is that each color is a separate element in the mold, which favors clean, limited-color logos over photographic art. Screen printing lays spot colors onto the surface and is economical once volumes climb, but it struggles with gradients and fine blends because every color is its own screen. Full-color UV or dye-sublimation printing is the route when you need photographic detail, gradients, or many colors, at the cost of a printed layer that can abrade over a long service life and a generally higher price.
The honest way to choose is by logo, not by preference. A two- or three-color mark with solid shapes is happiest molded, where it will outlast everything else on the bar. A design with a photograph, a gradient, or a dozen colors needs full-color printing and should be understood as a mat that looks fantastic and will show wear sooner than a molded one.
Preparing artwork that actually holds up on rubber
Whatever the method, supply vector artwork, an AI, EPS, or print-ready PDF, rather than a low-resolution logo pulled off a website. Vector art scales to any mat size without going soft, and it lets the manufacturer separate colors cleanly. Convert all text to outlines so fonts do not substitute, and specify your brand colors as Pantone (PMS) values so the shop can match them consistently across a run instead of guessing from an on-screen RGB approximation.
Rubber also has physical limits that paper does not. Very thin lines and tiny type disappear when a design is cast or printed at bar-mat scale, so avoid hairline strokes and set small text with enough weight to survive; when in doubt, thicken fine elements and enlarge a tagline rather than trusting it to reproduce. Leave a little breathing room at the edges instead of running art fully to the border, since the mat’s raised lip and drainage channels can crop a full-bleed layout. A proof from the manufacturer is the moment to catch all of this, and it is worth slowing down for.
Minimums, lead times, and what drives them
Custom mats carry order minimums and production time that vary by route. Stock molds with a customized insert can start around five pieces and ship quickly; a fully custom molded design typically asks for a minimum near ten pieces and takes longer because tooling has to be made; full-color printed mats sit in between on minimums but can move faster than custom molds since no new mold is cut. The figures below are indicative and shift with art complexity, size, and how busy the shop is, so treat them as planning ranges rather than quotes.
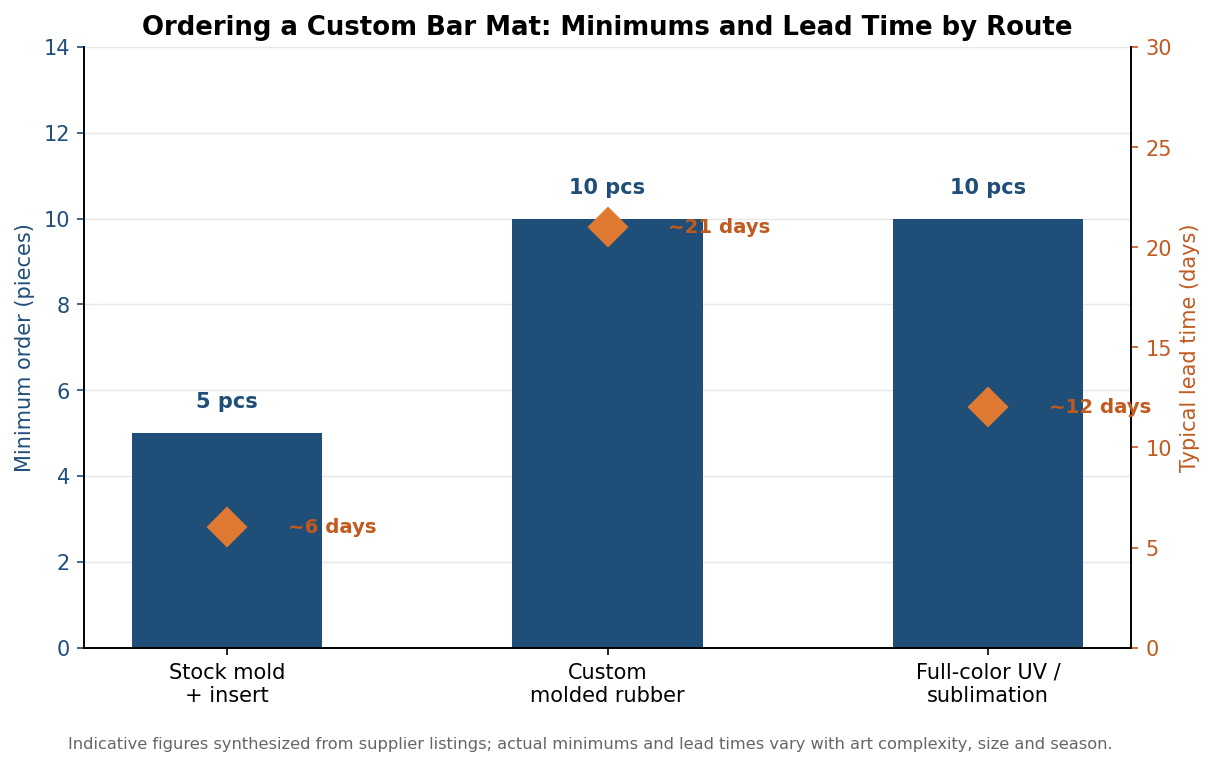
The practical lesson is to plan backward from the date you need mats in hand. If a taproom opening or a sponsorship activation is four weeks out and you want durable molded mats, that is comfortable; if it is one week out, a printed route or a stock mold with an insert is the realistic option. Rushing a custom mold is where deadlines and budgets both break.
A quick spec checklist before you send art
Before you hit send on an order, confirm five things in one place. Name the mat size and whether it is a rail or service format, so layout and price are pinned down. State the decoration method, molded, screen printed, or full color, and make sure your logo actually suits it. Attach vector artwork with text outlined and list your PMS colors. Note the quantity against the route’s minimum, and mark your in-hands date so lead time is not a surprise. Ask for a proof and actually read it. Get those five right and the mat that shows up is the one you designed, sized for its spot on the bar, carrying a logo that stays sharp long after the first shift.